I love shooting in natural light, although sometimes the lighting just isn’t good enough. I’m sure you’ve been there before. I decided to take the plunge and purchase an SB-700 Speedlight for my Nikon. I hit the gate running, learning everything I could about artificial lighting. That’s when I discovered the Rogue Starter Lighting Kit from ExpoImaging, I was already familiar with the quality of their ExpoDisc white balance filter, so I was ecstatic when they sent us out a kit to review!
Disclosure: This post may contain affiliate links where we earn a small commission at no additional cost to you. We only feature products we use and would recommend to our friends.
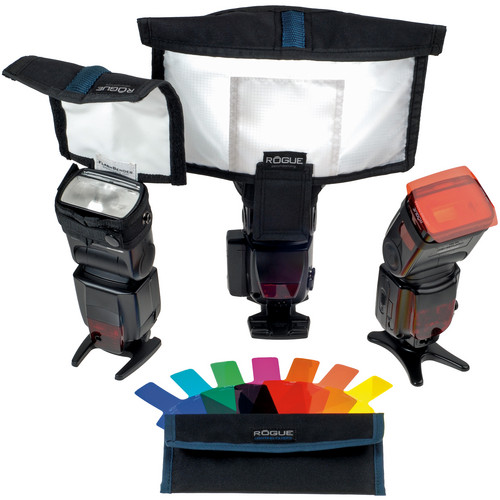
It includes the basics, everything I was learning about diffusing and manipulating the light from my speedlight (shoe-mount flashes shown in photo above NOT included in kit):
Small FlashBender to throw the light in different directions
Small Diffusion Panel for softening the harsh light from the flash, acting as a small soft box
Bounce Card/Flag for reflecting or shielding light from your subject
Rogue Universal Gel Kit for correcting, manipulating, or diffusing the light
The day the kit arrived happened to be the Scott Kelby Worldwide Photo Walk, so I packed the kit in my bag and off I went! I experimented a lot bouncing and reflecting light in different directions, some photos turned out…some didn’t. That happens when you’re first starting out, right? One photo I took that night really stood out to me. It’s the photo you see here. I’d like to share with you a little behind-the-scenes story about this shot in particular…
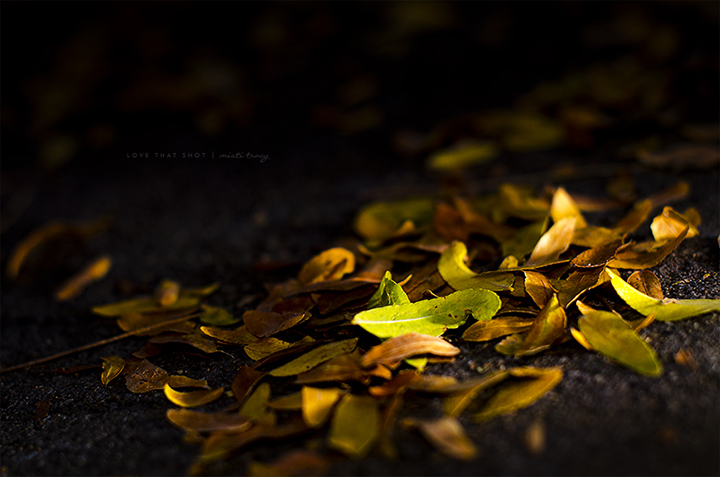
Nikon D7000 | 50mm 1.4 lens | f/2.8 | 1/250 sec | ISO 100 | SB-700 Speedlight | ExpoImaging FlashBender
Small FlashBender
It might look as though I shot this photo at night. But in fact, I shot this around 7:00 pm just as the sun was beginning to set. There was plenty of light all around to make this photo look as if it was taken during the day. So how did I create this effect? Pretty easily, actually…with the help of the small FlashBender from the starter kit, that is.
 One of my favorite uses for the FlashBender is to make a snoot…yes, I said snoot. Really, that is a word! It literally means a tube that controls the direction and radius of a light source. Think “spot light.” I bent the FlashBender around my flash, as you see in this image, and laid my flash on the ground to the right of the grouping of leaves. It created a nice spot light effect. Then, I set up my camera settings to under expose slightly to create the night-time lighting effect.
.
There are several other ways to use the FlashBender. Really, you’re only limited to your imagination. It’s designed to be used on-camera since it’s so light-weight and easy to use, but can also be used in off-camera flash situations like the photo of the leaves above. Here are just a few of the ways the FlashBender can be used:

Small Diffusion Panel
The diffusion panel is a dream! Imagine being able to soften the light that comes from your flash to create a soft box type of effect without all the expensive and bulky equipment. The diffusion panel attaches right to the FlashBender you see above, using velcro strips.

Bounce Card/Flag
The bounce card and flag works similarly to the FlashBender in that you can bend and reflect the light in any way you like, as well as shield the light from particular areas of your photo.

Universal Gels
And finally, the gels. These little guys are amazing and so easy to use! They’re designed to lay right over your shoe-mount flash, attached with an included band that holds them snugly in place. There are five correction filters, one diffusion filter, and 14 color gels to create any kind of lighting you can imagine. Plus, included in the kit is a durable case to store them safely.
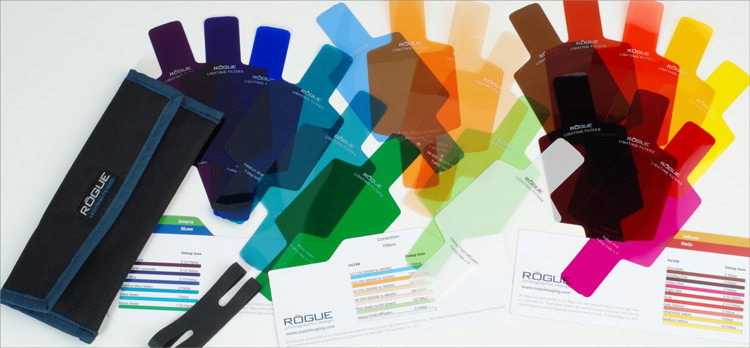
Your artistic expression is limitless with this kit! Bend, shape, manipulate the light any way you like. Create dramatic lighting by shaping your light into a snoot and spot light your subject, change the mood by altering the color, or diffuse the light to create a more subtle lighting effect. It’s all up to you!
UPDATE: The starter kit is no longer available, although individual pieces are available to purchase. I’ve included links to the individual products earlier in this post.
Leave A Comment